MikroTik supports HTTPS for WebFig and API, but it is disabled by default.
Transferring data over HTTP is not secure, even within a Local Area Network (LAN), because HTTP does not encrypt the data being transmitted. This can include sensitive information such as login credentials, configuration details, or any other data sent to or from your MikroTik router over HTTP.
If any devices on your LAN are compromised, an attacker can intercept HTTP traffic between you and your MikroTik router.
To improve security and encrypt communications with your MikroTik router, you need to enable HTTPS. This is not a straightforward process, as enabling HTTPS on MikroTik for WebFig and API requires you to manually configure and use a valid certificate.
In this post, you will learn how to generate a self-signed SSL certificate on MikroTik, enable HTTPS for WebFig and API, and disable services that use insecure HTTP.
Cool Tip: How to configure NordVPN on a MikroTik router! Read more →
Enable HTTPS on MikroTik for WebFig & API
To enable HTTPS on MikroTik, first of all it is required to create valid SSL certificates.
Create a CA certificate:
[admin@MikroTik] > /certificate add name=root-ca-template \
                                    common-name=root-ca \
                                    days-valid=99999 \
                                    key-size=2048 \
                                    key-usage=crl-sign,key-cert-sign

[admin@MikroTik] > /certificate sign root-ca-template name=root-ca
Create a MikroTik SSL certificate:
[admin@MikroTik] > /certificate add name=mikrotik-ssl-template \
                                    common-name=mikrotik-ssl \
                                    days-valid=99999 \
                                    key-size=2048

[admin@MikroTik] > /certificate sign mikrotik-ssl-template name=mikrotik-ssl \
                                                         ca=root-ca
Make the MicroTik SSL certificate trusted:
[admin@MikroTik] > /certificate set [find name=mikrotik-ssl] trusted=yes
Assign the MicroTik SSL certificate to www-ssl and api-ssl services and enable them:
[admin@MikroTik] > /ip service set www-ssl certificate=mikrotik-ssl disabled=no
[admin@MikroTik] > /ip service set api-ssl certificate=mikrotik-ssl disabled=no
Disable non-https www and api services:
[admin@MikroTik] > /ip service set www disabled=yes
[admin@MikroTik] > /ip service set api disabled=yes
[admin@MikroTik] > /ip service print
Flags: X - DISABLED, I - INVALID
Columns: NAME, PORT, CERTIFICATE, VRF
#   NAME     PORT  CERTIFICATE   VRF
0 X telnet     23                main
1 X ftp        21
2 X www        80                main
3   ssh        22                main
4   www-ssl   443  mikrotik-ssl  main
5 X api      8728                main
6   winbox   8291                main
7   api-ssl  8729  mikrotik-ssl  main
Now, when you open your MikroTik router’s WebFig URL with HTTPS in the browser, it will warn you about the self-signed certificate – simply click on Advanced and Continue, that will add it to the trusted certificates.
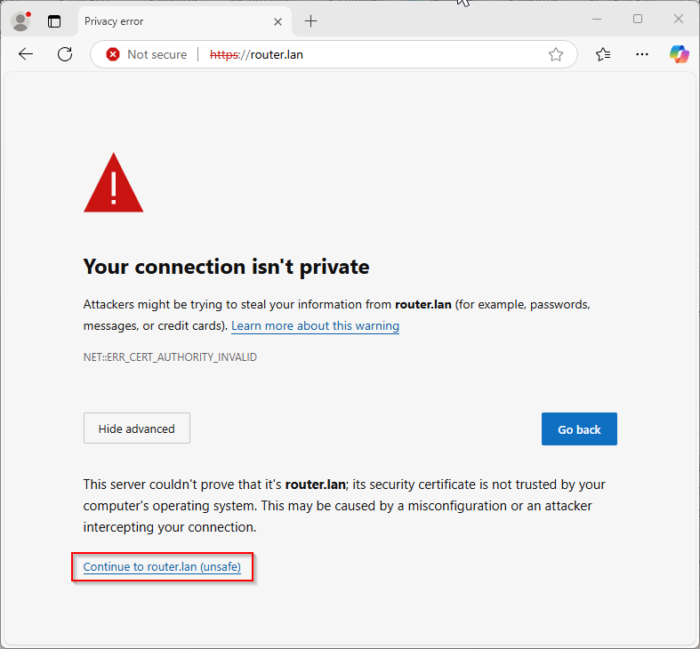
Don’t worry, even if we use a self-signed certificate for accessing MikroTik, the communication will still be encrypted.
Cool Tip: Get Telegram notifications when someone is trying to log into your MikroTik router! Read more →
In conclusion, enabling HTTPS for WebFig and API on your MikroTik router is a crucial step in enhancing the security of your network communications. While the process may seem complex, generating a self-signed SSL certificate and configuring it on your router will provide encrypted communication, safeguarding sensitive information from potential threats within your LAN. By following the steps outlined in this guide, you can ensure that your MikroTik router’s administration interface is secure.